Before you start
- Your host must offer SSH access. Many shared plans enable it only on request or on higher plans. In cPanel, search for "SSH Access". If it is missing or disabled, ask your host's support to enable it.
- You need access to your hosting control panel. These screenshots are from cPanel. Other panels look different, but the steps are the same: generate a key, add its public half to your account, authorize it, verify.
- You need about five minutes.
1Find your cPanel details
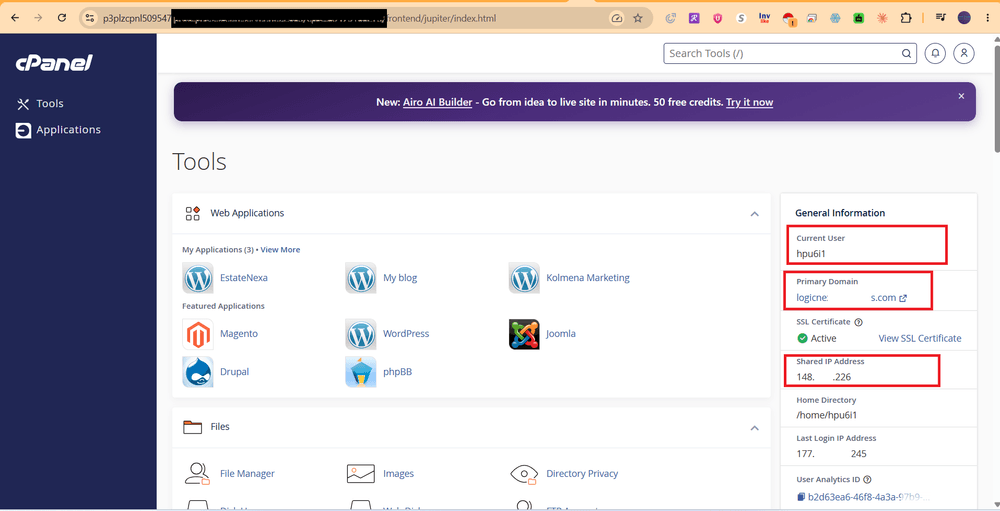
Log into cPanel and note two things from the Tools home screen: your cPanel username and your server's Shared IP Address (this is the SSH host you'll enter in SiftWP).
2Fill in Add a Site
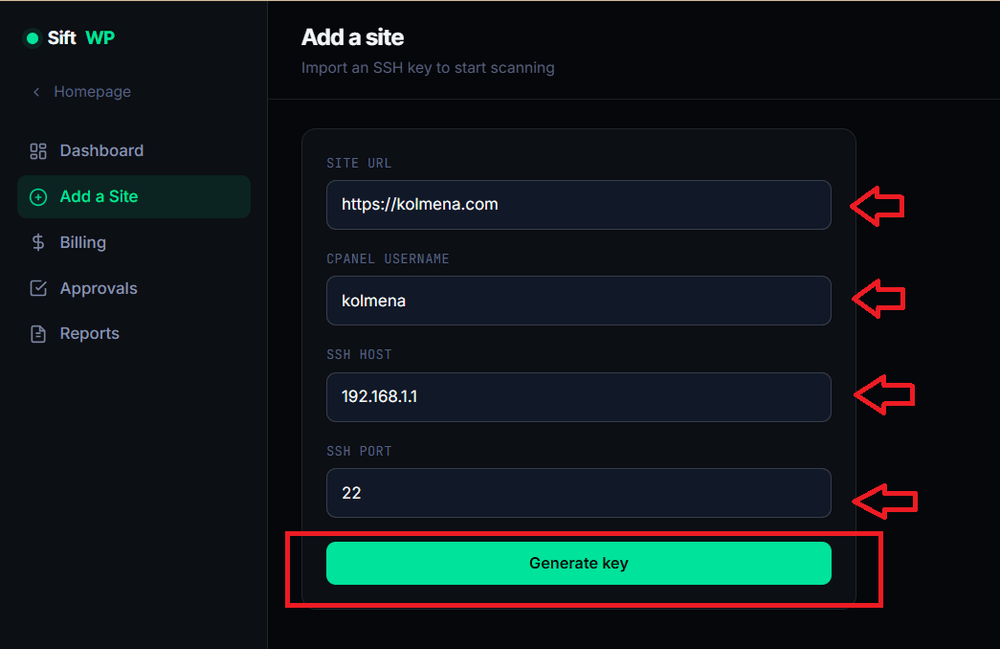
In SiftWP, go to Add a Site and enter your site URL, cPanel username, SSH host, and SSH port (usually 22). Click Generate key.
3Copy the generated public key
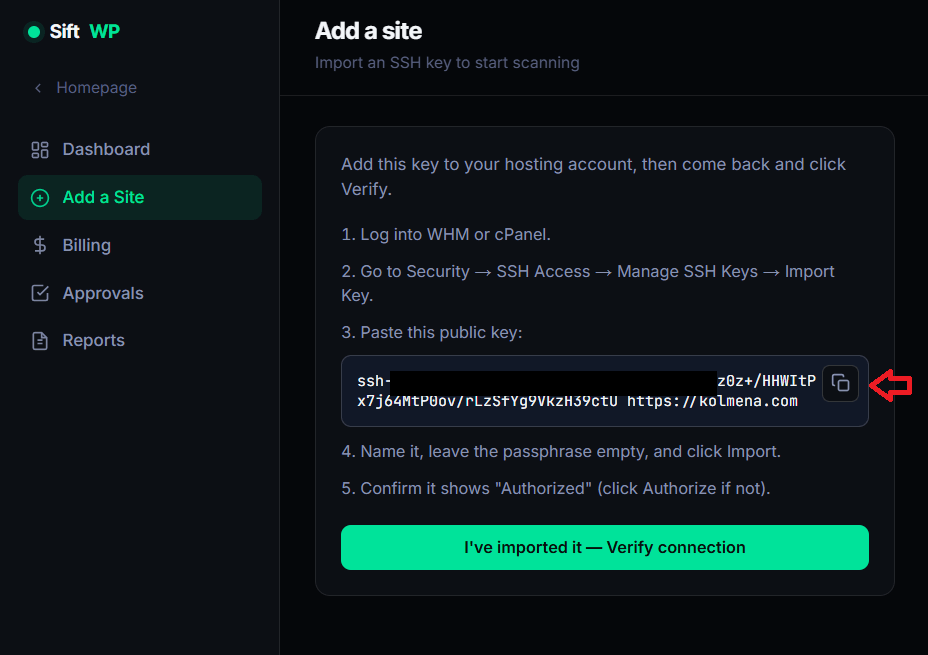
SiftWP generates a public key just for this site and shows you the exact steps to import it. Keep this screen open in one tab — you'll come back to it.
4Open SSH Access in cPanel
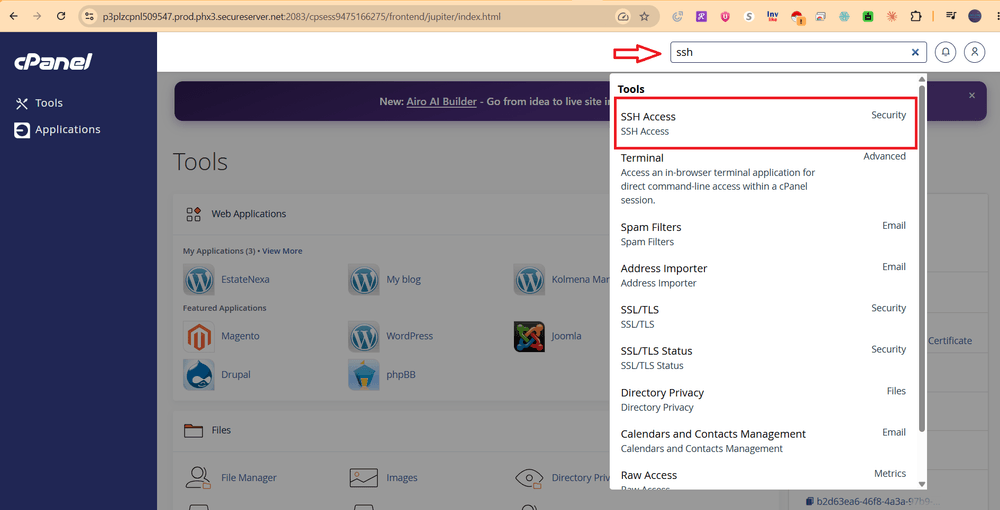
In a new tab, open cPanel and type ssh into the global search box. Click the SSH Access result.
5Open Manage SSH Keys
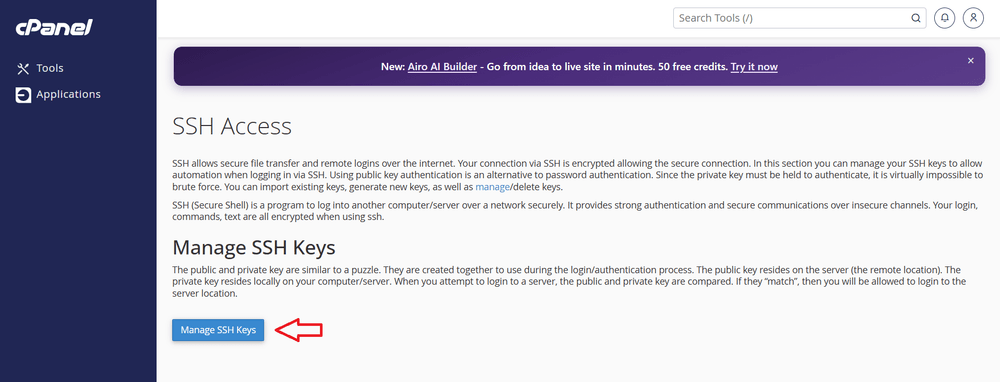
On the SSH Access page, click Manage SSH Keys.
6Import the key
On the Manage SSH Keys page, click Import Key.
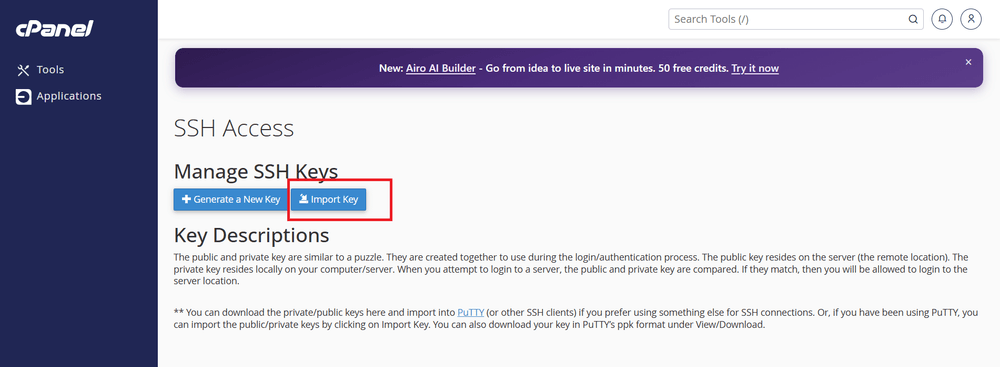
Give the key a name (something like "SiftWP SSH" makes it easy to find later), leave the private key and passphrase fields empty, and paste the public key SiftWP generated into the Public Key field. Click Import.
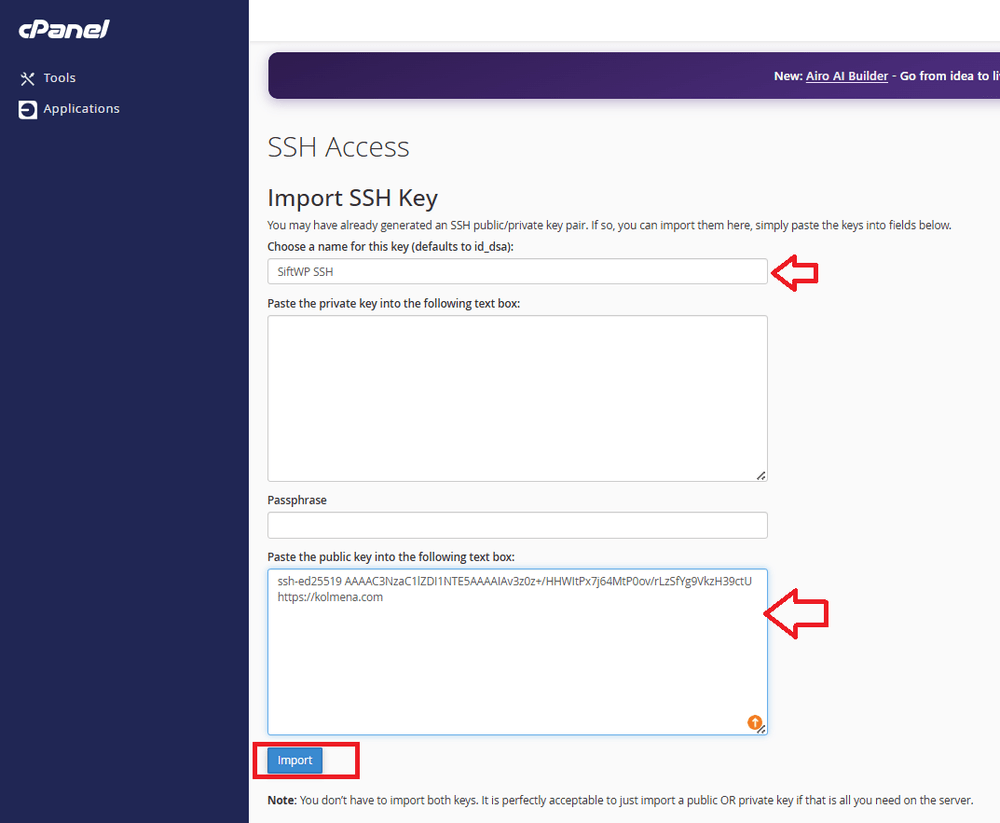
You'll see a confirmation that the key was imported.
7Authorize the key
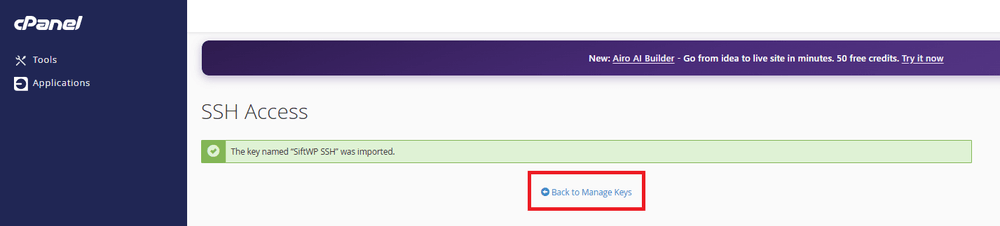
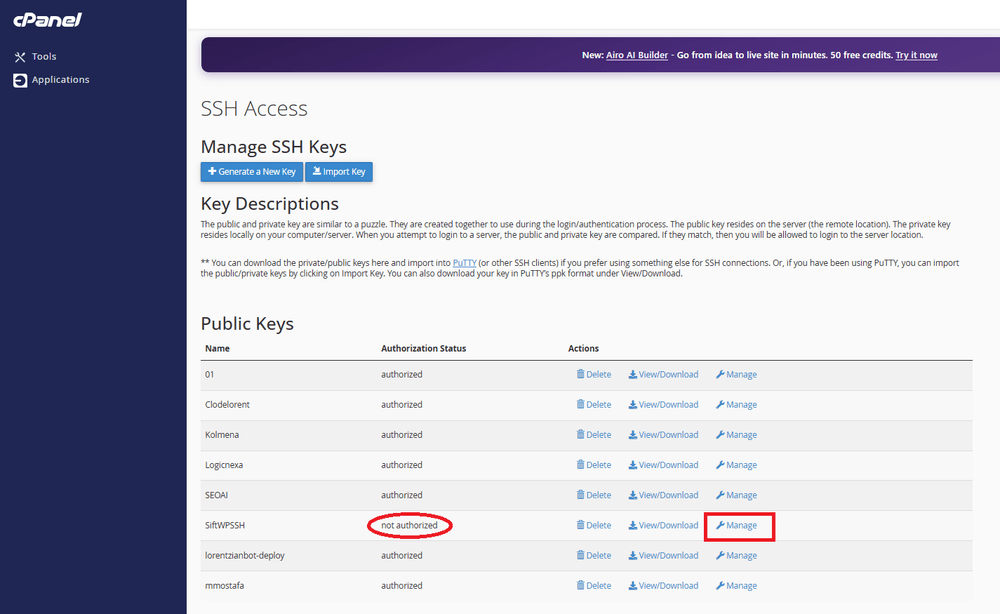
Back on the Manage SSH Keys page, find your new key in the Public Keys table — it will show as not authorized at first. Click Manage next to it.
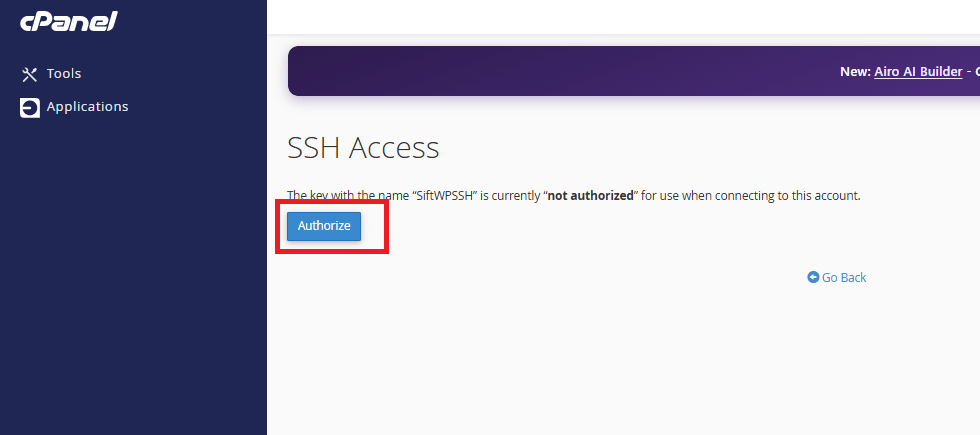
Click Authorize to activate the key.
8Verify the connection
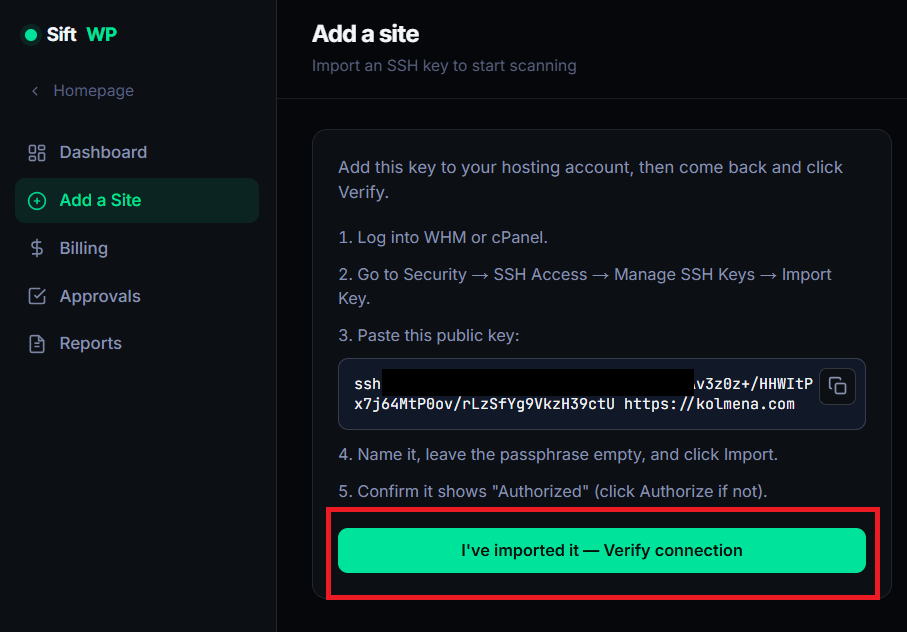
Switch back to the SiftWP tab and click "I've imported it — Verify connection." SiftWP will confirm it can reach your site over SSH, and your first scan will kick off shortly after.
If verification fails
- Check the host and port. They must match what cPanel showed in step 1. The port is usually 22, but some hosts use another.
- Check that the key is authorized. Imported is not enough. In Manage SSH Keys the key must show as authorized.
- Check that SSH is allowed on your plan. If "SSH Access" is missing from cPanel, ask your host to enable it.
- Check for IP restrictions. Some hosts only allow SSH from listed addresses. Ask your host whether that applies to your account.
If it still fails, write to hello@siftwp.com with the host name and the error shown.
If your host is not cPanel
The steps are the same on any host that supports SSH key login: add the public key SiftWP gives you to your account, make sure it is allowed to log in, then verify. Only the screens differ. Menu names change between versions and hosts, so use these as a guide and ask your host's support if something is missing.
- PleskFirst check that shell access is on. Open Websites & Domains, choose the domain, open Web Hosting Access and set the SSH access option to a shell such as
/bin/bash, then save. Next open SSH Keys for that domain (it comes from an extension, so ask your host if you do not see it), choose Add Key and paste the public key SiftWP generated. Use the SSH host, username and port that Plesk shows for the domain when you fill in the form in SiftWP. - Managed WordPress hostsLook for an SSH or Developer tools page in your host's dashboard and add the public key there. Many managed hosts show a separate SSH host, username and port for each site, and the port is often not 22, so copy those exact values into SiftWP. Some hosts do not offer SSH on every plan, and some limit what an SSH user can run. SiftWP needs to read files and run WP-CLI, so if the host restricts that, ask its support whether the plan allows it.
- VPS or your own serverAppend the public key to
~/.ssh/authorized_keysfor the user SiftWP will log in as.
Once verified, SiftWP runs its first scan automatically and checks back weekly after that. No plugin gets installed, and nothing about your WordPress admin login is ever touched. Curious what a scan actually checks? See WordPress security without a plugin, or look up any unfamiliar term in the security glossary.